JavaScript with Firebase Authentication (Sign-up and Sign-In page)

Hi 🙂 I am Oluwapelumi. A software engineer with experience in Frontend development, AI/ML majorly focused on computer vision. Writing about applied ML, system design and frontend–AI integration.
In this article, I'll be guiding you on how to add authentication to your existing website or a new website with just JavaScript🔥
Prerequisites
Before reading and trying to implement firebase on your JavaScript website, I'll recommend you know these;
- HTML
- Basic knowledge of CSS
- Basic knowledge of JavaScript
What are we building?
What you should get familiar with before you continue
- Firebase: Firebase is a Backend-as-a-Service (Baas). It provides developers with a variety of tools and services to help them develop quality apps, grow their user base, and earn profit. So out of several services firebase provides us with, I'll be explaining how to implement the sign-up and sign-in with JavaScript.
Why Firebase?
You might want to consider using firebase for the following reasons;
1. Authentication: Firebase supports several log-in and sign-up authentications such as email with passwords, email, Facebook, Twitter, Github and others.
2. Hosting: Firebase supports fast hosting for web applications as much as other hosting websites.
3. Realtime database: Data is synced across all clients in real-time and remains available even when an app goes offline.
4. Notifications: Firebase helps with notification services as you can send notifications with no additional coding.
I will be explaining the authentication part with JavaScript in this article.
With the six steps as highlighted below, we will have an authenticated page using firebase
A. Set up your code editor.
B. Setting up firebase in firebase console
C. Upgrade to the v9 modular SDK
D. Working on the JavaScript file
E. Sign-up function
F. Sign-in function
Let's go!🎈
A. Set up your code editor.
As the title of my project is firebase X javascript, I'll be creating three main files as below;
firebase X javascript
index.html
styles.css
script.js
index.html
<!DOCTYPE html>
<html lang="en">
<head>
    <meta charset="UTF-8">
    <meta http-equiv="X-UA-Compatible" content="IE=edge">
    <meta name="viewport" content="width=device-width, initial-scale=1.0">
    <title>Sign up</title>
    <link rel="stylesheet" href="styles.css">
    <script src="https://www.gstatic.com/firebasejs/9.11.0/firebase-app-compat.js"></script>
    <script src="https://www.gstatic.com/firebasejs/9.11.0/firebase-firestore-compat.js"></script>
    <script src="https://www.gstatic.com/firebasejs/9.11.0/firebase-auth-compat.js"></script>
</head>
<body>
    <div class="container">
        <div>
        <h3>Create an account</h3>
        <p>Create an account using the form below.</p>
        </div>
        <!-- Form -->
        <div class="form">
            <!-- Email  -->
            <div class="email">
                <label for="email">Email</label>
                <input
                type="email"
                name="email"
                id="email"
                placeholder="Your Email"
                />
            </div>
            <br>
            <!-- Password -->
            <div class="password">
                <label for="password">Password</label>
                <input
                type="password"
                name="password"
                id="password"
                placeholder="Password"
                />
            </div>
             <br>
            <!-- Submit -->
            <button id = "submit-btn" onclick = "signUp()">SIGN UP </button>
            <!-- Sign-In -->
            <h5>Have an account already?</h5>
            <a href="signIn.html">Sign In</a>
        </div>

    <script src="script.js"></script>
</body>
</html>
styles.css
* {
  padding: 0;
  margin: 0;
  box-sizing: border-box;
}

body {
  background-color: burlywood;
}

.container {
  text-align: center;
  width: 100%;
  margin: 40px 0px;
}

h3 {
  font-size: 60px;
  letter-spacing: 10px;
  line-height: 60px;
  text-align: center;
}

p {
  font-size: 35px;
  margin-bottom: 30px;
  text-align: center;
}

label {
  font-size: 27px;
}

input {
  border-radius: 5px;
  border: none;
  padding: 10px 20px;
  width: 30%;
}

#submit-btn {
  cursor: pointer;
  background-color: black;
  color: wheat;
  padding: 10px 30px;
  border-radius: 5px;
  margin-bottom: 10px;
}

#submit:hover {
  color: black;
  background-color: wheat;
}

a {
  text-decoration: none;
}
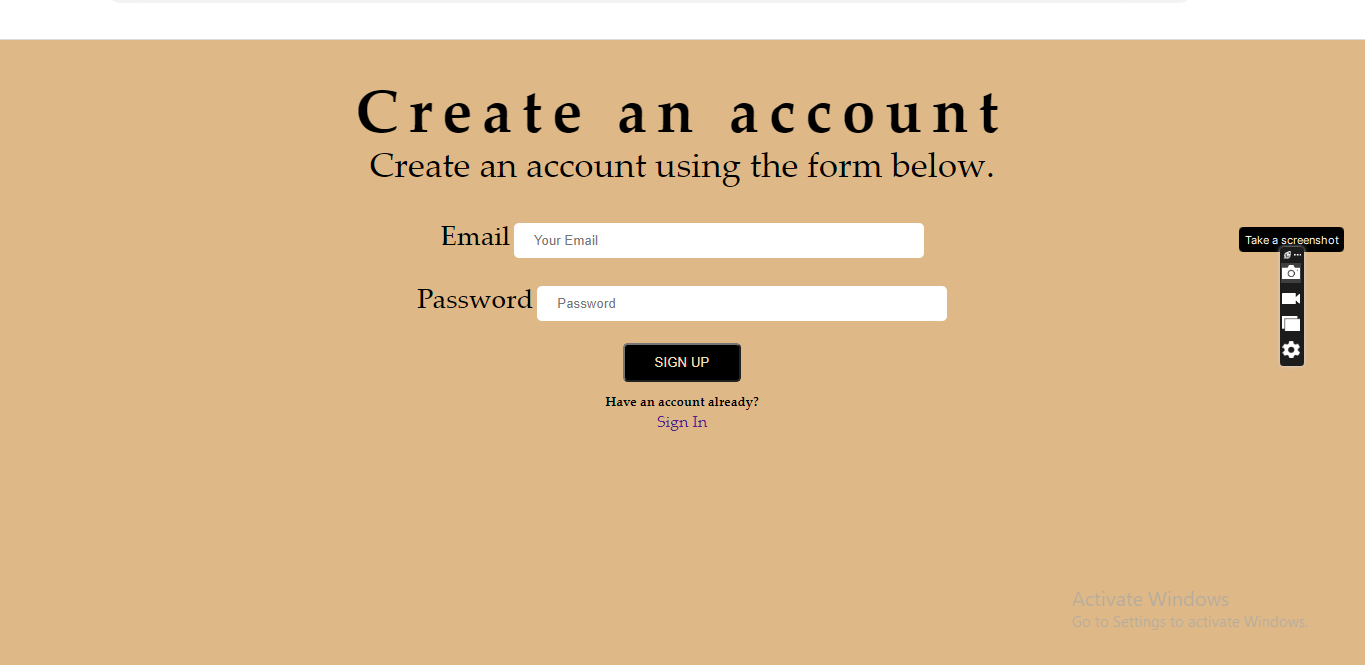
Above is the sign-up HTML and CSS page I created. If you don't have one yet. Go ahead and copy to your code editor, and run with live server (Alt L Alt O).
B. Setting up firebase in firebase console.
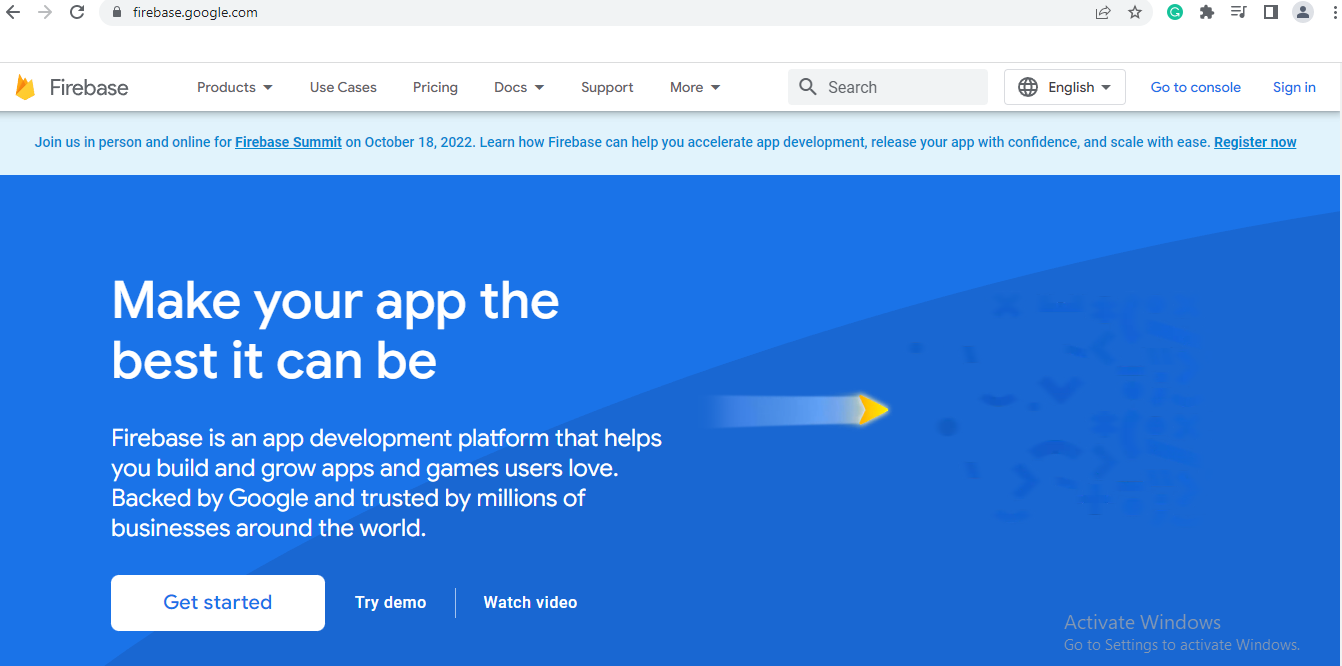
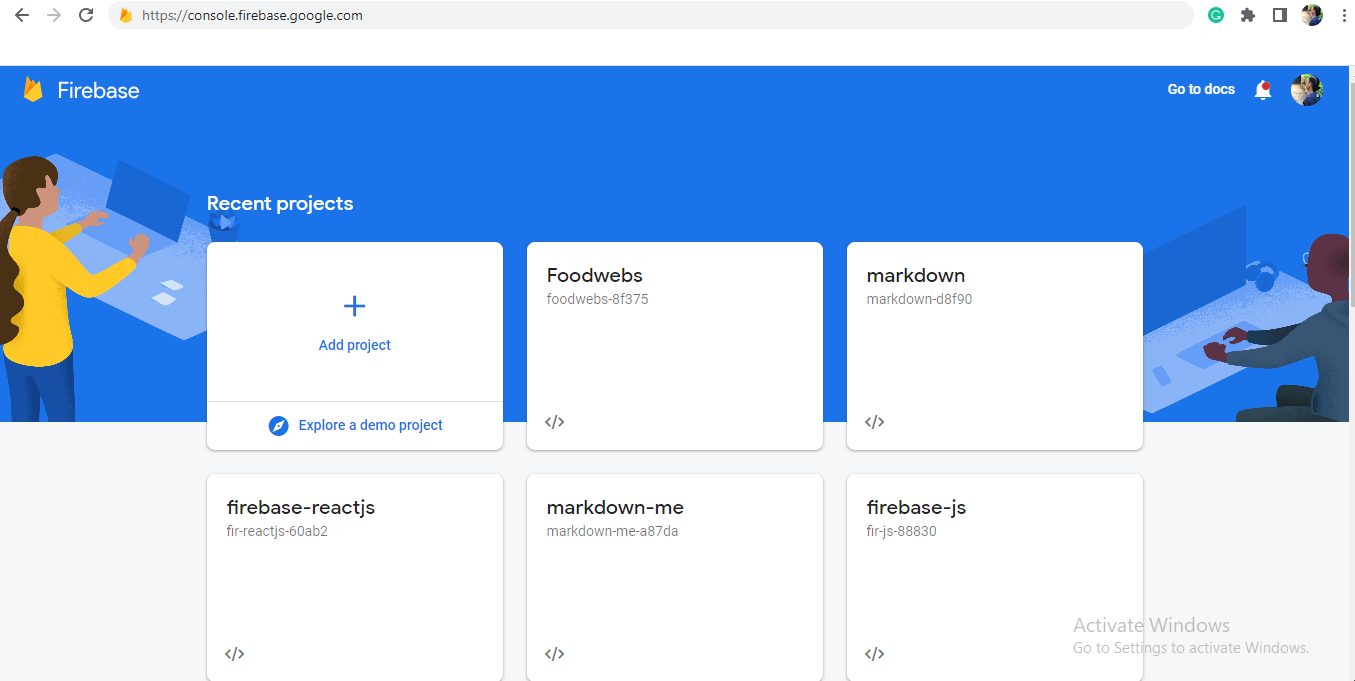
The next step is to visit the firebase website
You will have the image above, sign-in with your email(if you have one already). After signing in, on the upper right corner, you will see a Go to console
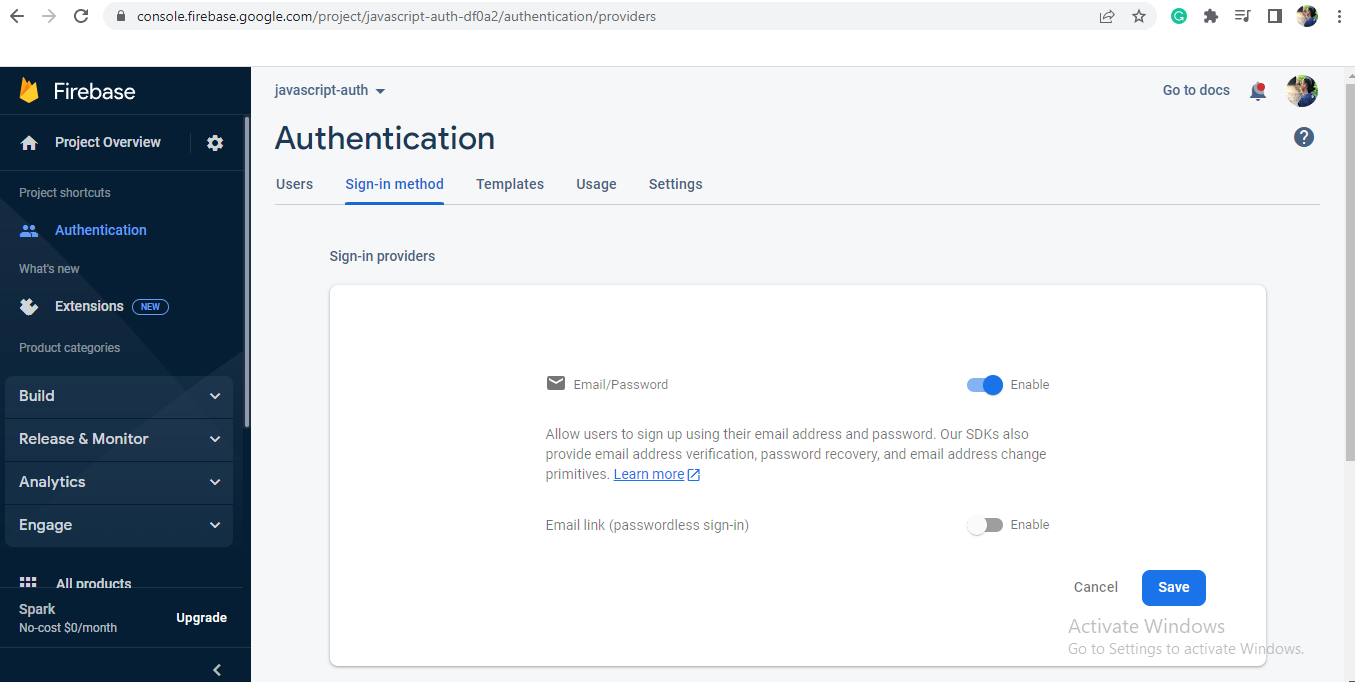
Click on the "Add project", give your project a name, continue and the analytics part is up to you. After that, right under the "Build" product categories, click on Authentication, then toggle over the Email/Password sign-in options
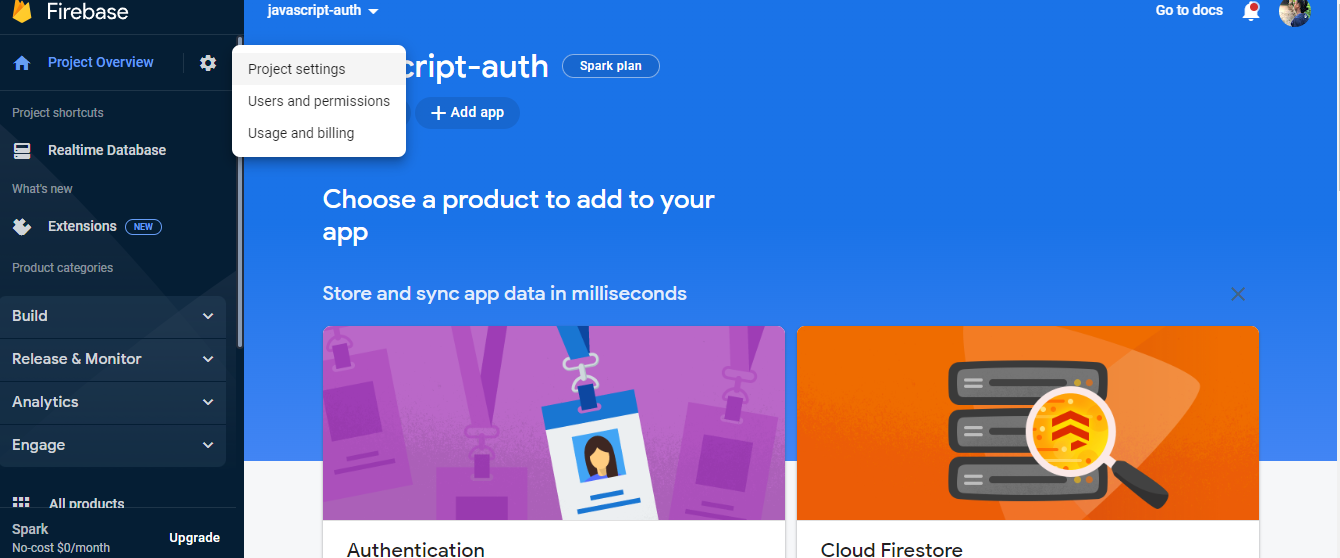
Then we have to set up the Web app, on the top left corner, click on project overview, we have three main set up, Apple, Andriod and Web...you will only see these three when you hover over the icons right on the page. Click on Web and let's add Firebase to our Web app, give it a name and register.
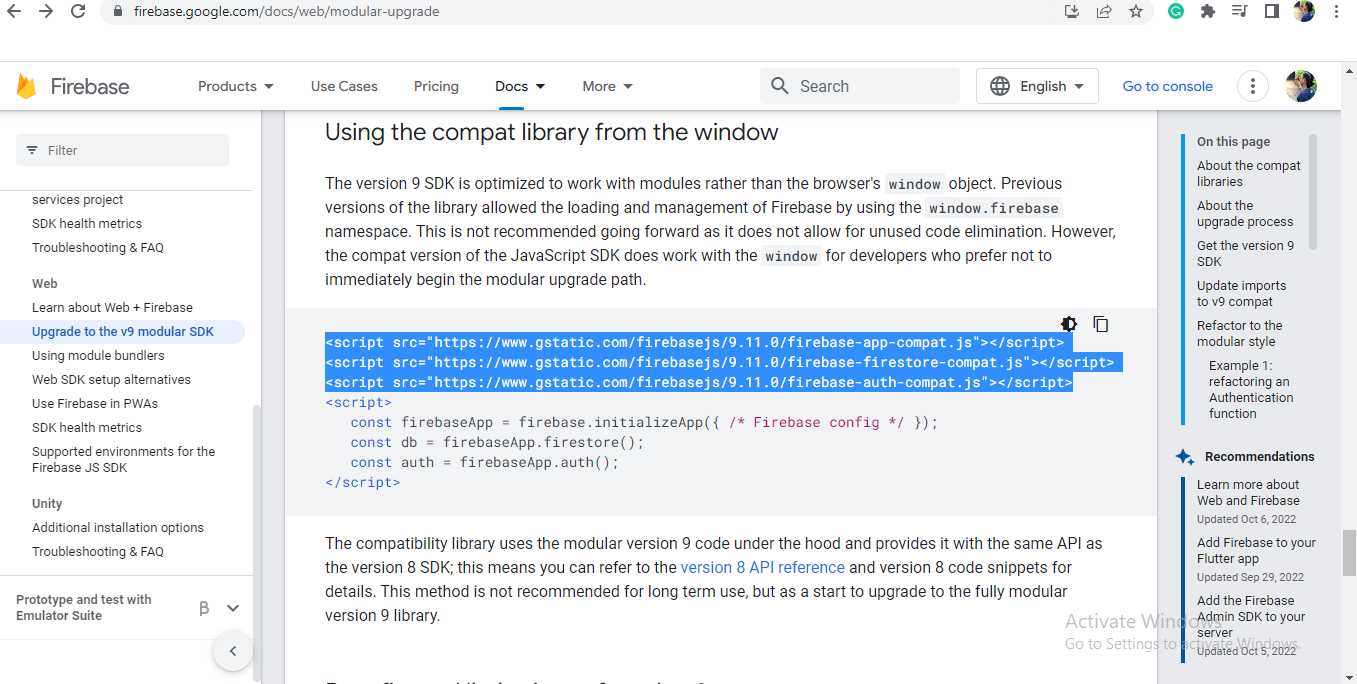
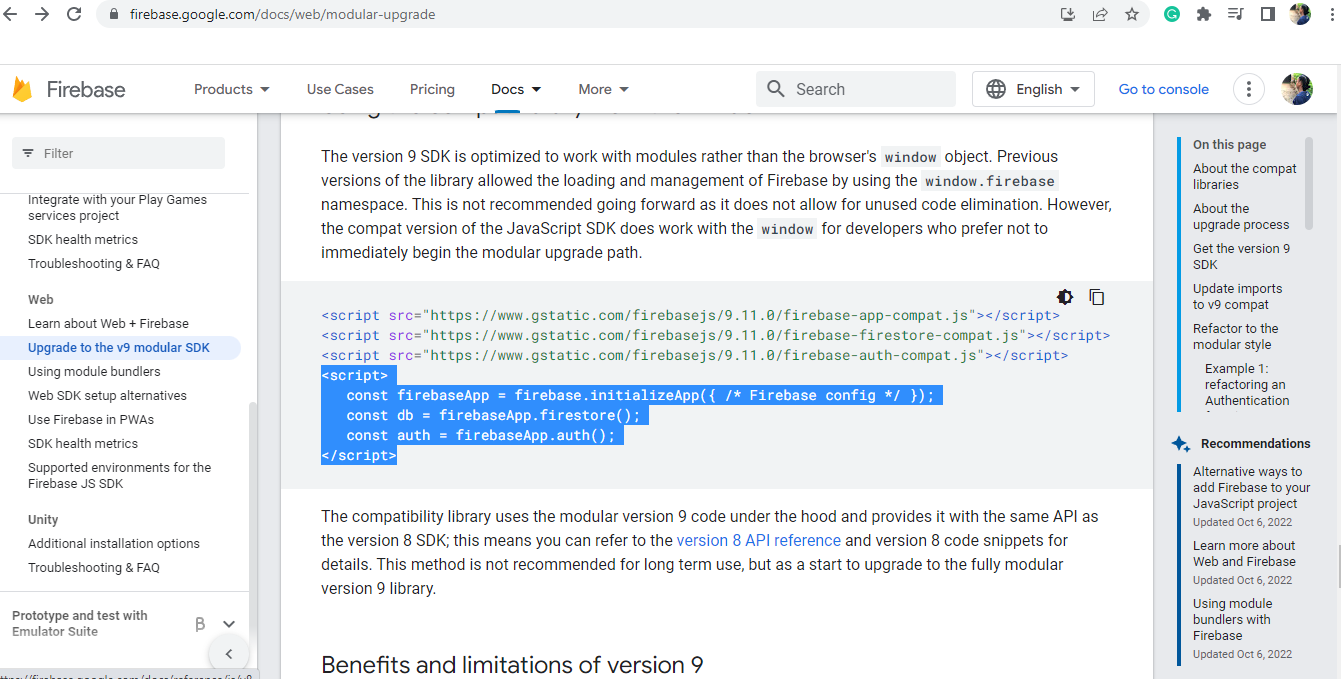
C. Upgrade to the v9 modular SDK
The only link we need here is the first three script tag link below, then add them to the head tag, right after the stylesheet tag.
Go to docs at the top right corner, click on this link and go all the way down to copy your link.
D. Working on the JavaScript file
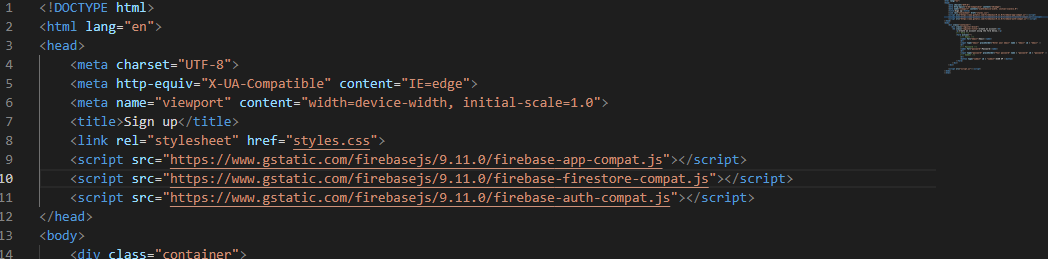
Open up your script file, we are working on it now. Still on the v9 modular SDK, we have three lines embedded right inside the script tag after the ones we copied earlier, check the image below. Copy the lines and head straight to the javascript file you created earlier.
If you closely check the first script tag line, you will notice a place having "Fïrebase Config", have your eye on it because we are about to paste few lines of code from our console.
So head back to the console page. On the top left corner, we have project overview, right beside it, click on the settings icon and click on project settings.
On getting to the project settings page, scroll all the way down till you get something similar to the picture below
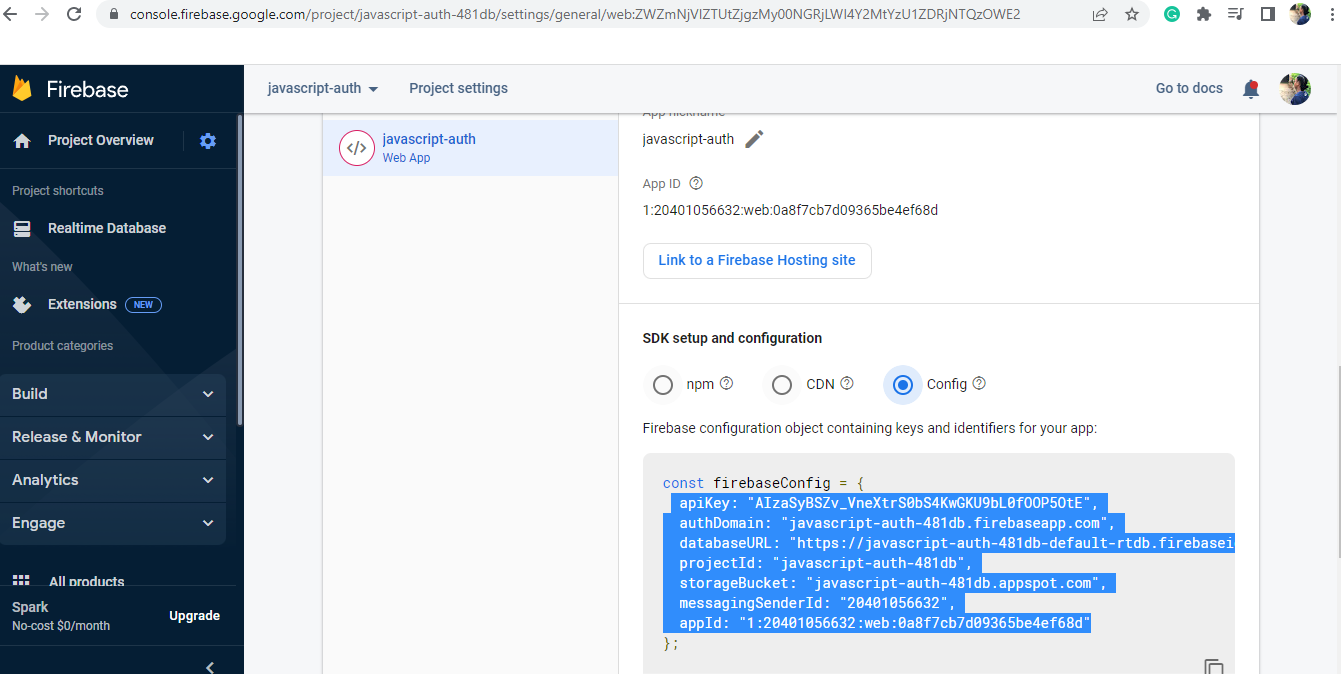
Change the initial settings of "npm" to "Config" to copy the firebase configuration object containing keys and identifiers for your app. Copy all the way from apiKey to appId as highlighted above.
Remember I said something about having your eye on the code you copied to your javaScript project, now we are pasting all the firebaseConfig copied above to the area commented. Check below;

E. Sign-up function
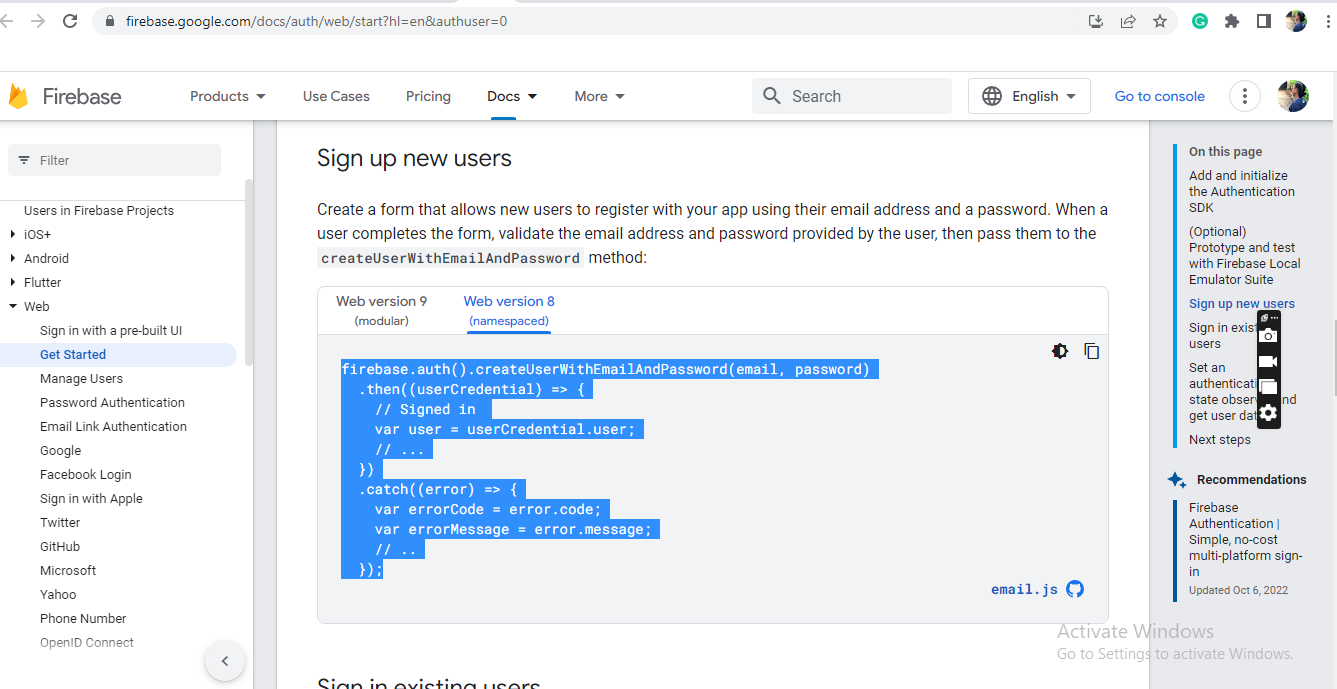
The next thing to do is creating a sign-up function but first we need to copy lines of code for sign-up from the docs. Click here to get there. You should see image below when you scroll a little down.
Then we create a sign-up function in the javascript file(index.js) right after where we stopped earlier and also get the value of the email and password by accessing the id.
    //creating the signUp function
 const signUp = () => {

  //getting the value of email
    const email = document.getElementById("email").value;
    const password = document.getElementById("password").value;

    }
After this, insert our copied block of code into the function. So we have this;
//creating the signUp function
const signUp = () => {
  //getting the value of email
  const email = document.getElementById("email").value;
  //getting the value of password
  const password = document.getElementById("password").value;

  //copied from firebase docs
  firebase
    .auth()
    .createUserWithEmailAndPassword(email, password)
    .then((userCredential) => {
      // Signed in
      var user = userCredential.user;
      // ...
    })
    .catch((error) => {
      var errorCode = error.code;
      var errorMessage = error.message;
      // ..
    });
};
Before we move to the next step, let's call signUp on our submit button to connect the email and password. Here is the code below;
<!-- Submit -->
<button id = "submit-btn" onclick = "signUp()">SIGN UP </button>
Let's make some changes to the firebase docs we copied so we can redirect to another page as you wanted;
firebase
  .auth()
  .createUserWithEmailAndPassword(email, password)
  .then((result) => {
    // Signed in
    window.location.replace("newpage.html");
    console.log(result);
    // ...
  })
  .catch((error) => {
    console.log(error.message);
    // ..
  });
The above code was just structured to simply help when signed up, we want the user to be redirected to that new page(newpage.html) Now, you can check and confirm if you are able to access a new page you created, if not kindly go through the code above again and check for errors, you can also debug for possible JavaScript bug.
I would also like you to add this in; you should add your domain to the authorized domains in firebase so it would be redirected when you want that to happen. From your console, to build, then click on Authentication, click on settings. From there you will see Authorized domains, then add your current address 127.0.0.1 and also your deployed address(when your project is finally deployed).
F. Sign-in function.
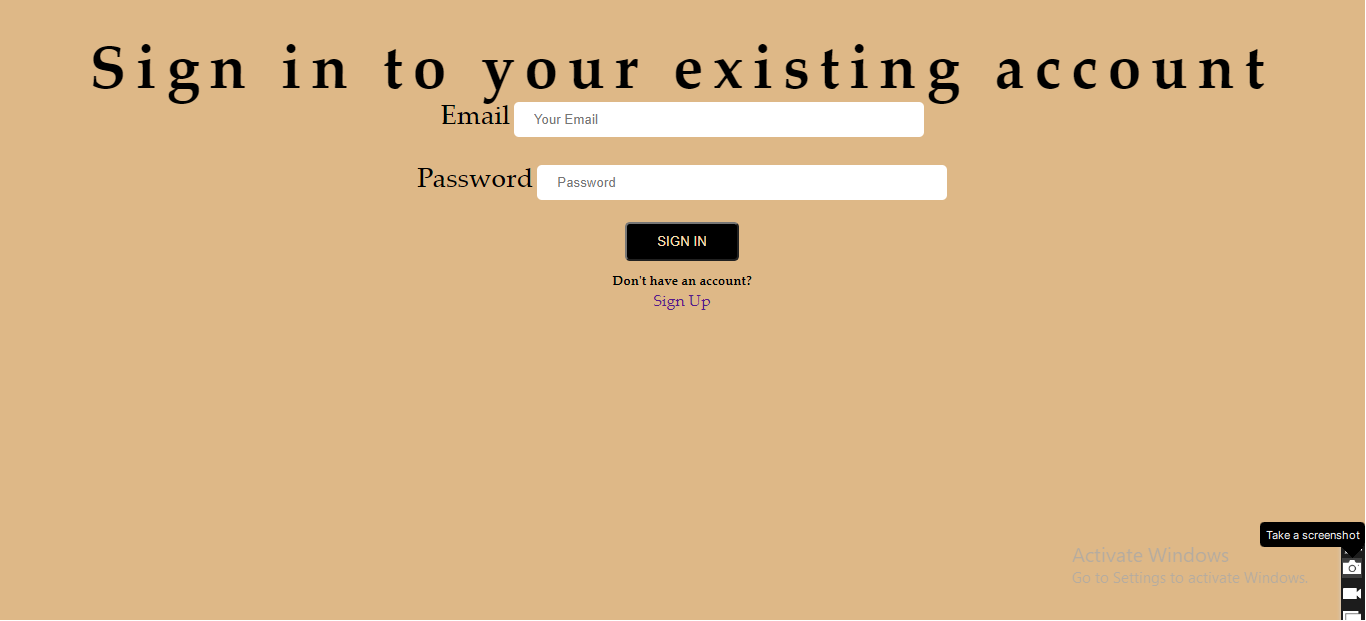
For all actions made, there should be a reaction. We have our sign-up page, we should have for sign-in as well. This is just the same way as the sign-up. First, let's start with the index.html file, we need to add the sign-in link on the sign-up page
index.html
 <!-- Sign-In -->
<p>Have an account already?</p>
<a href="signIn.html">Sign In</a>
You can add this to any part of your html file.
- Let's create the sign-in page and content(logging in with email and password) I"ll copy the initial index.html file so the styling can still be same but change some tags and the called function
signIn.html
<!DOCTYPE html>
<html lang="en">
<head>
    <meta charset="UTF-8">
    <meta http-equiv="X-UA-Compatible" content="IE=edge">
    <meta name="viewport" content="width=device-width, initial-scale=1.0">
    <title>Sign up</title>
    <link rel="stylesheet" href="styles.css">
    <script src="https://www.gstatic.com/firebasejs/9.11.0/firebase-app-compat.js"></script>
    <script src="https://www.gstatic.com/firebasejs/9.11.0/firebase-firestore-compat.js"></script>
    <script src="https://www.gstatic.com/firebasejs/9.11.0/firebase-auth-compat.js"></script>
</head>
<body>
    <body>
    <div class="container">
        <div>
        <h3>Sign in to your existing account</h3>

        </div>
        <!-- Form -->
        <div class="form">
            <!-- Email  -->
            <div class="email">
                <label for="email">Email</label>
                <input
                type="email"
                name="email"
                id="email"
                placeholder="Your Email"
                />
            </div>
            <br>
            <!-- Password -->
            <div class="password">
                <label for="password">Password</label>
                <input
                type="password"
                name="password"
                id="password"
                placeholder="Password"
                />
            </div>
             <br>
            <!-- Submit -->
            <button id = "submit-btn" onclick = "signIn()"> SIGN IN </button>
              <!-- Sign-Up -->
            <h5>Don't have an account?</h5>
            <a href="index.html">Sign Up</a>
        </div>

    <script src="script.js"></script>
</body>
</html>
- As the sign-up was done, we are doing same for the sign-in.
First, lets create our function right after the sign-up function and get the value of email and password in the JavaScript file.
script.js
const signIn = () => {
const email = document.getElementById("email").value;
const password = document.getElementById("password").value;


}
Now we add the code(sign in existing users) right from the docs into the signIn function and make some changes as we did for sign up. Here is the code below;
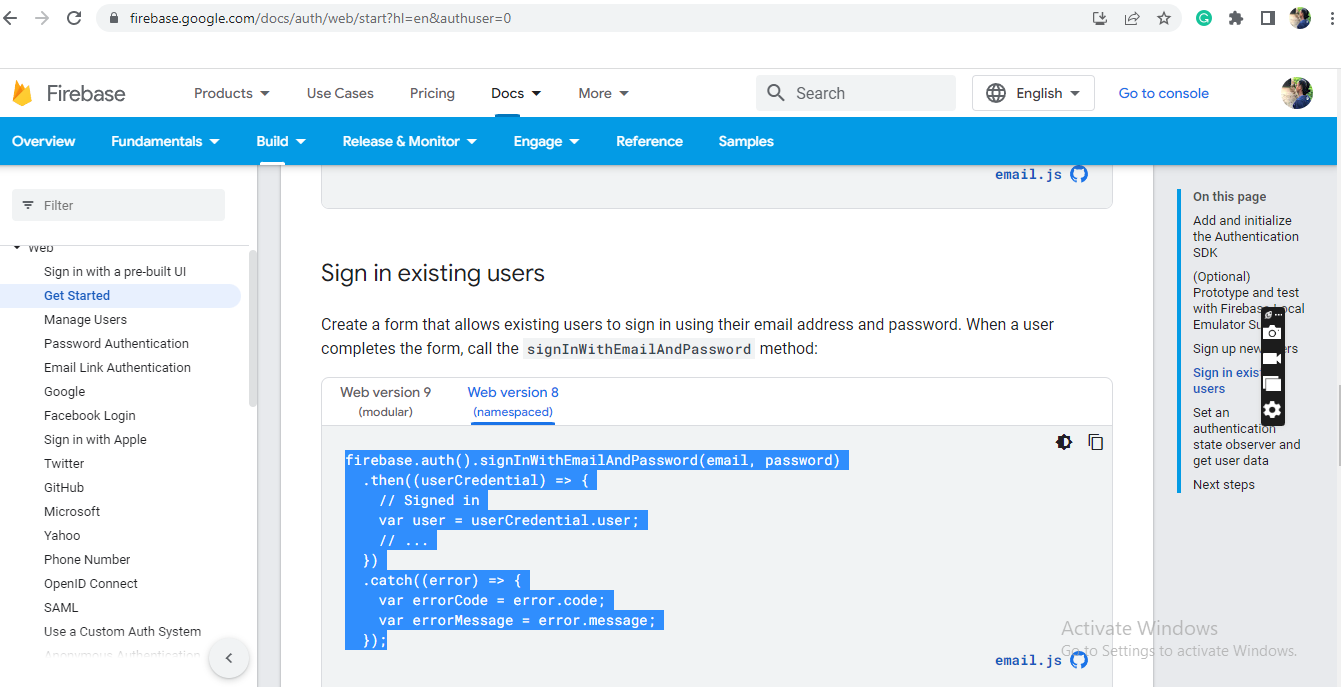
firebase
  .auth()
  .signInWithEmailAndPassword(email, password)
  .then((result) => {
    // Signed in
    window.location.replace("newpage.html");
    console.log(result);
    // ...
  })
  .catch((error) => {
    var errorCode = error.code;
    var errorMessage = error.message;
  });
At this point, you should be able to allow users sign-up and sign-in using firebase for your big project.
Feel free to ask me questions via comment and you can also send messages directly to me on twitter for collaborations or article topics.
Here is the full source code, I'ld be glad if you can give it a star.
Thank you for reading this far💥
Are you a front-end developer? Then this is for you. Six Websites All Front-end Developers Should Know.


